
Hello!
So like I promised here is my first pattern! My roommate is going to be a crazy cat lady for Halloween and she wanted me to make a crochet cat to sit on her shoulder, so in the spirt of Halloween I decided to make it a black cat.
She ended up using this cat along with 4 other cats that were stitched all over her costume. This was a very creative and unique costume and she ended up winning with it! I like to think that I helped contribute to this win.
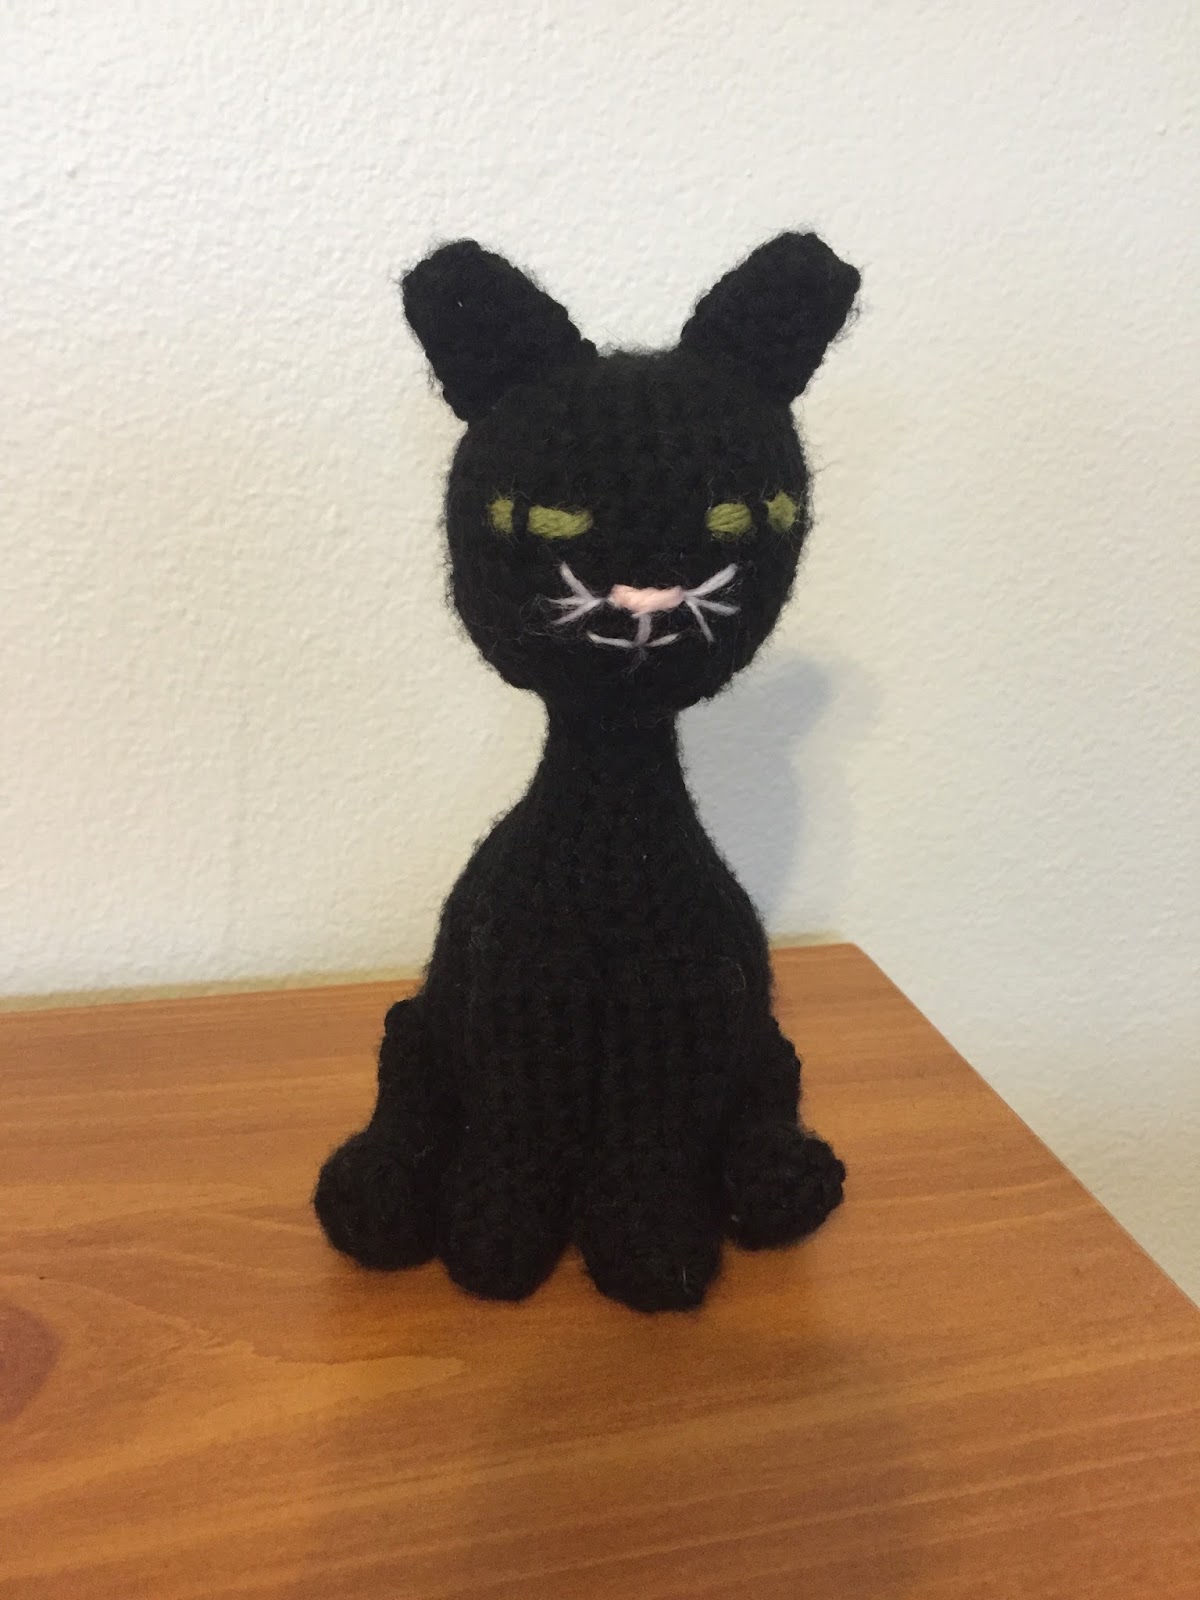
This crochet pattern measures to be about 6 inches tall and 2 1/2 inches wide.
You can choose any color of yarn that you want to create the cat. I chose the black yarn to make it more halloween themed. My roommate also wanted it to look like one of the cats she has back at home, which is black. So I was able to make it work for both! If this is one of you first amigurumi patterns I would recommend not choosing black. The black yarn can sometimes make it a bit difficult to distinguish the different stitches. I would recommend going with more of a light color like a tan color or even a orange. The lighter colors allow for there to be better contrast between the stitches and are therefore easier to execute the crochet stitches. However, if you are up for the challenge of the black yarn go for it!
If you want a PDF version of this pattern you can purchase one at my etsy store for only $2.25!
heycrochailey-etsy-sit-on-my-shoulder-cat-crochet-pattern
Happy crocheting!

You will need:
- 3.5mm crochet hook
- yarn of your choice (I used Red Heart Super Saver Economy Yarn, Black
)
- polyester toy stuffing (I used Fairfield Poly-Fil Premium
)
- Blunt end yarn needle
- Scissors
- Straight pins (to help with assembly)
I decided to use the 3.5 mm crochet hook to make tighter stitches. The tighter stitches made a smaller amigurumi animal and was the perrr-fect size for sitting on your shoulder! If you choose to use a larger or smaller crochet hook, that is fine it will just make your amigurumi animal larger or smaller.

Difficulty: Moderate (some of the assembly is a bit tricky).
This patterns has the following stitches:
- st = stitch
- sc = single crochet (UK double crochet)
- dc = double crochet (UK triple crochet)
- ch = chain
- inc = two sc in one stitch
- 2tog = two stitches together (decrease)
- f/o = finish off
Note: This pattern is worked in continuous rounds without joining each round.
Main:
This pattern starts at the top of the head and transitions into the body.

Using your main color ch 3
Round 1: 6 sc into first ch of your chain 3 (6)
Round 2: inc in each sc (12)
Round 3: [inc in next sc, 1 sc in next sc] 6 times (18)
Round 4: [inc in next sc, 2 sc] 6 times (24)
Round 5: [inc in next sc, 3 sc] 6 times (30)
Round 6-11: 30 sc (30)
Round12: [2tog, 3 sc] 6 times (24)
Round 13: [2tog, 2 sc] 6 times (18)
Round 14: [2tog, 1 sc] 6 times (12)
------Put stuffing into the head, now we move into the neck/body------
Round 15: [2tog, 4 sc] 2 times (10)
Round 16-18: 10 sc (10)
Round 19: [inc, 4 sc] twice (12)
Round 20: [inc, 5 sc] twice (14)
Round 21: [inc, 6 sc] twice (16)
Round 22: [inc, 7 sc] twice (18)
Round 23: [inc, 4 sc] three times, inc, 2 sc (22)
Round 24: [inc, 10 sc] twice (24)
Round 25: [inc, 5 sc] four times (28)
Round 26: [inc, 13 sc] twice (30)
Round 27-33: 30 sc (30)
Round 34: [2tog, 3 sc] 6 times (24)
Round 35: [2tog, 2sc] 6 times (18)
Round 36: [2tog, 1 sc] 6 times (12)
------Put stuffing in the body, make sure to firmly stuff the neck------
Round 37: [2tog] 6 times (6)
F/o
Ears:
Make two. Make sure to leave a long tail for assembly.

Using your main color ch 3
Round 1: 4 sc into first ch of chain 3 (4)
Round 2: [inc, 1 sc] twice (6)
Round 3: [inc, 2 sc] twice (8)
Round 4: 8 sc (8)
Round 5: [inc, 3 sc] twice (10)
F/o
Legs:
Make four. Only put stuffing in the foot. Leave long tail for assembly.

Using your main color ch 3
Round 1: 4 sc into the first ch of chain 3 (4)
Round 2: inc in each st (8)
Round 3: 8 sc (8)
Round 4: 3 sc, 4 dc, 1 sc (8)
Round 5: 2 sc, 4 dc, 2 sc (8)
Round 6: 1 sc, 4 dc, 3 sc (8)
Round 7-11: 8 sc (8)
F/o
Tail:
Leave long tail for assembly.


Using your main color ch 3
Round 1: 4 sc into the first ch of chain 3 (4)
Round 2: [inc, 1 sc] twice (6)
Round 3- 17: 6 sc (6)
F/o
Note: you can make the tail as long or as short as you would like.

Using your needle you will sew together all the parts. Use straight pins to hold together the different parts as you go.
- Sew ears to the head.
- Sew on the front legs to the body. Make sure the front legs are side by side and touching. Sew the leg all the way form the top to the end of the body. The only thing that should be free is the foot.
- Sew on the hind legs. The hind legs will be attached to the side of the cats body as if the cat was sitting.
- Sew on tail.


After you have fully assembled your cat you will have to tuck in your extra stings. I usually just stuff them into the animal with the needle or the back of the crochet hook.
After the assembly you can give your cat a face. This requires a few extra yarn colors. I used green, light pink and white. Here is the close up of the face if you want to use it as an example. I decided to use yarn for all of the facial feature of my animal but you could always use stuffed animal safety eyes. You would just have to make sure to add the safety eyes to the head as you were crocheting.

I know that selecting yarn for projects can sometime be challenging. Should you go the thrifty route, the most natural, etc.? Most the time I try to be as thrifty as possible however whenever I am making things for babies or small children I like to try and use a natural option of yarn and filling. Below I have both the thrifty option and the natural option of yarn/filling for this project!
Thrifty:
Yarn: Red Heart Super Saver Economy Yarn, BlackFilling: Fairfield Poly-Fil Premium Polyester Fiber, White, 1 Bag, 12-Ounce
Natural/Organic :
Yarn:2 Skeins Mondial Bio Soft Certified Organic 100% Cotton Yarn (Carbon Black 200)
Filling:Organic Raw Cotton Fiber - Natural Color - By the Pound
Don't miss my next pattern!
Please Note: This pattern in the property of heycrochailey. You may not sell or redistribute this pattern in any way.
However you may: Post up to two pictures on your blog or website with a link back to this post.
You may also: Sell your own handmade items form this pattern as long as there is a clearly listed link back to this post in your description.
However you may: Post up to two pictures on your blog or website with a link back to this post.
You may also: Sell your own handmade items form this pattern as long as there is a clearly listed link back to this post in your description.
Wow, this is exactly what I was looking for! I've seen a lot of patterns for a cat, but none of them really worked for me. I love this pattern and it seems easy enough to to follow. Thanks and I'll be back! :)
ReplyDelete